When you’re deep into a textile project – the intricate lacework of a hand-knit shawl, the precise lines of a quilt block, or the meticulous stitching of a garment – nothing frustrates more than a piece that just won't lay flat or hold its shape. Enter the humble yet mighty T pin. Far from being just another needle in the cushion, T pins for textile arts (blocking, sewing, quilting) are specialized tools designed to bring unparalleled stability, precision, and ease to your most demanding creative endeavors. They’re the unsung heroes that transform wobbly edges into crisp lines and give your finished pieces that professional, polished look.
At a Glance: Why T-Pins Are Your Textile Art MVPs
- Superior Holding Power: The distinctive "T" bar head provides a larger surface area, making them easy to grip, remove, and less likely to slip through fabric.
- Thick Fabric Friendly: Their sharp, robust points glide through multiple layers of fabric, dense fibers, and even foam blocking mats where traditional straight pins struggle.
- Ideal for Blocking: Essential for wet or steam blocking knit and crochet items, helping them achieve their final dimensions and drape.
- Precision in Sewing & Quilting: Perfect for securing bulky seams, aligning complex patterns, attaching bindings, or holding heavy fabrics without bending.
- Versatile Beyond Textiles: Also invaluable for wig making, displaying jewelry, securing documents to cubicle walls, and various general crafts.
- Durable & Reusable: Typically made from nickel-plated steel or stainless steel, they're built for longevity with proper care.
Why T-Pins Stand Tall: The Unsung Hero of Your Craft Room
Think about the standard straight pin. It’s thin, often has a small plastic or glass head, and can easily get lost or bend under pressure. Now, picture a T pin. Its defining feature is that iconic horizontal bar, or "T" head, which immediately sets it apart. This simple design isn’t just aesthetic; it’s a game-changer for anyone working with textiles.
That T-bar provides a significant advantage: an easy-to-grip surface that prevents the pin from disappearing into thicker materials or slipping through your fingers when wet. It also allows you to exert more force without bending the pin itself. Brands like Mr. Pen highlight how their sharp points make it easy to push through thick sheaves of cloth, paper, or even wig caps, while the smooth T-bar head ensures effortless removal. When you need a pin that offers secure hold, easy manipulation, and won't buckle under the demands of your project, T-pins are the unequivocal choice.
Sizing Up Your Success: Choosing the Right T-Pin Length and Gauge
Just like paintbrushes come in different sizes for different strokes, T-pins offer a range of lengths and gauges (thicknesses) to suit specific tasks. Understanding these differences ensures you always have the right tool at hand.
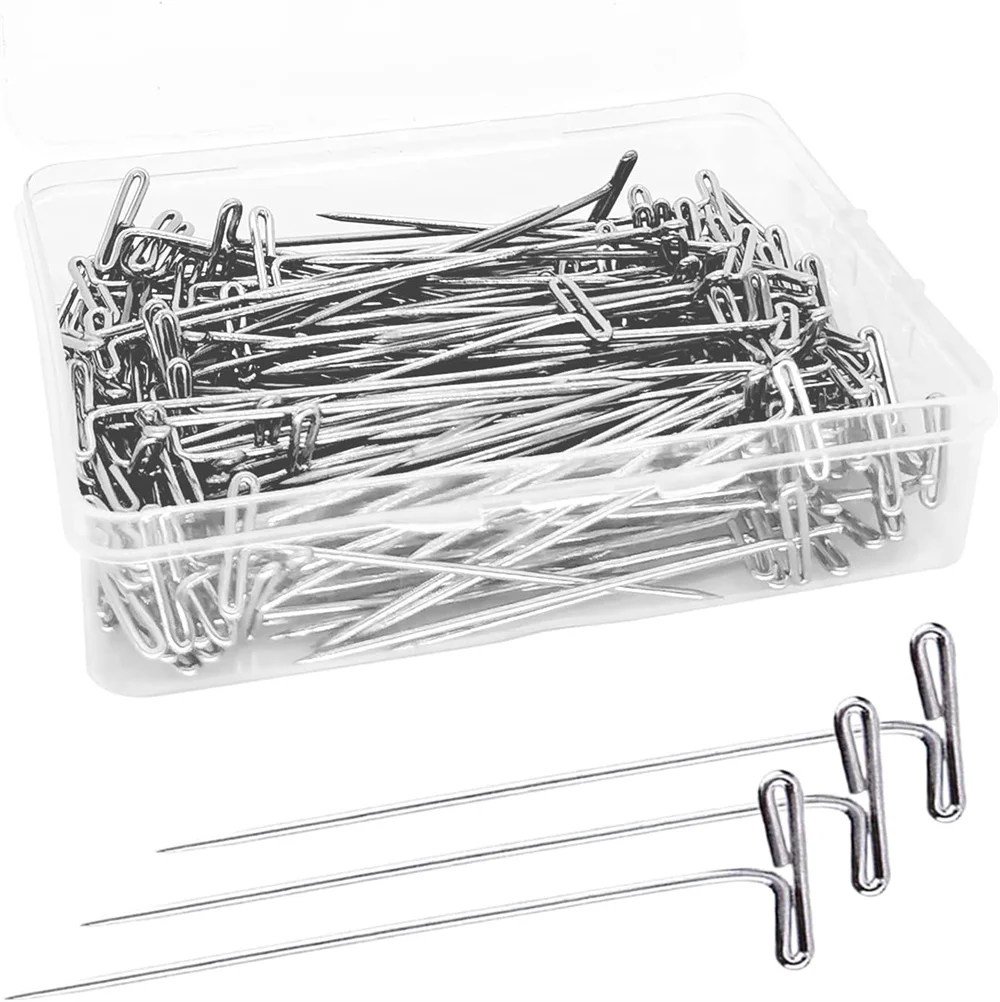
Common T-pin lengths you’ll encounter include 1 inch, 1 1/4 inch, 1 1/2 inch, 1 3/4 inch, and 2 inches. Some assortments, like those offered by Mr. Pen, conveniently include these five sizes in one pack, partitioned in a plastic box for easy storage and selection.
- Shorter Pins (1" - 1 1/4"): These are fantastic for more delicate work, holding smaller pieces, or securing items to a thin blocking mat where you don't need deep penetration. They're less intrusive and ideal for projects where you want minimal visual impact while working.
- Mid-Range Pins (1 1/2" - 1 3/4"): The workhorses of your T-pin collection, these are incredibly versatile. They're perfect for general blocking, securing medium-weight fabrics in sewing, or holding multiple quilt layers.
- Longer Pins (2"): When you need serious grip, these are your go-to. Use them for pinning very thick materials, dense blocking mats, or for projects that require maximum stability. They provide deeper anchorage, ensuring your fabric stays exactly where you want it.
Gauge (Thickness): While less commonly advertised than length, gauge refers to the pin's thickness. A lower gauge number indicates a thicker pin. Thicker pins are more robust and less likely to bend, making them excellent for heavy fabrics or tough blocking materials. Thinner pins are good for delicate fabrics where you want to minimize visible holes. Most general-purpose T-pins fall into a medium gauge that balances strength with minimal fabric disruption.
Consider the material you'll be working with most often. If you frequently block chunky knit sweaters or sew heavy denim, lean towards longer, slightly thicker pins. For fine lace shawls or delicate garment construction, a variety pack with shorter, medium-gauge pins might be more appropriate.
Blocking Brilliance: T-Pins for Perfect Finishes
If you knit or crochet, you know the magic of blocking. It’s the essential final step that transforms your lumpy, sometimes uneven project into a beautifully shaped, professional-looking piece. And at the heart of effective blocking? T-pins.
Blocking essentially involves wetting or steaming your finished item, then carefully shaping it to its desired dimensions, and letting it dry. T-pins are crucial because they anchor your fabric to a stable surface, allowing it to stretch and set correctly without distortion. For a complete guide on how to treat your fiber art, you'll want to explore proper care for your delicate hand-knits.
Your Step-by-Step Guide to Blocking with T-Pins:
- Prepare Your Surface: Lay out your specialized blocking mats that make all the difference on a flat, sturdy, water-safe surface. These interlocking foam mats are gridded, providing precise measurements for shaping. If you don’t have mats, a thick towel or a large piece of cardboard covered with a towel works, though it might lack grid lines.
- Wet Your Item:
- Wet Blocking: Submerge your knit/crochet item in lukewarm water with a gentle wool wash (if desired) for 15-30 minutes. Gently squeeze out excess water, then roll it in a clean towel to absorb more moisture. Avoid twisting or wringing.
- Steam Blocking: Pin your dry item to the mat. Hover a steam iron or garment steamer over the fabric, allowing the steam to penetrate the fibers without touching the iron directly to the material.
- Spray Blocking: For items that can't be submerged or steamed (e.g., delicate vintage lace), pin the dry item to the mat and lightly spritz with water until damp.
- Shape and Pin:
- Carefully lay your damp (or dry, for steam blocking) item on your prepared blocking surface. Gently stretch it to the desired measurements, using the grid lines on your mats as a guide.
- Begin inserting T-pins around the edges of your project, spacing them evenly. Start at corners, then work along straight edges, and finally around curves. For lace, pin out individual points to open up the pattern.
- Insert pins vertically or at a slight angle, pushing them firmly through the fabric and deep into the blocking mat. The T-bar head provides a sturdy grip against the fabric, preventing slippage as it dries. Use longer T-pins for denser mats or thicker edges.
- Dry Completely: Leave your project pinned until it is completely, utterly dry. This can take anywhere from a few hours to a couple of days, depending on humidity and fiber content. Patience is key!
- Unpin and Admire: Once dry, carefully remove the T-pins. You'll reveal a perfectly shaped, beautifully finished piece with even stitches and crisp edges.
Fiber-Specific Tips:
- Wool & Animal Fibers: These fibers respond beautifully to wet blocking as the water allows the fibers to relax and reshape.
- Synthetics & Plant Fibers (Cotton, Linen, Acrylic): These may require steam blocking or more aggressive stretching as they don't have the same "memory" as wool. For acrylics, a technique called "killing" or "heat setting" with steam can permanently relax the fibers.
Precision in Every Stitch: T-Pins for Sewing and Quilting
While blocking is a star application, T-pins are equally indispensable for a variety of sewing and quilting tasks, particularly when regular straight pins fall short. For a broader look at securing fabric, you might want to learn about different types of pins used in sewing.
When to Grab a T-Pin for Your Sewing Machine:
- Securing Thick Layers: Working with multiple layers of fabric for a bag, coat, or a weighty quilt sandwich? T-pins slice through them like butter and hold them securely, preventing shifting, where a typical straight pin would bend or struggle.
- Heavy Duty Fabrics: Denim, canvas, upholstery fabric, leather, or faux fur are no match for a T-pin. Their robust construction ensures they won't bend, and their sharp points penetrate dense weaves with ease.
- Aligning Quilt Blocks & Borders: When you need absolute precision to match seams or attach borders to a quilt top, T-pins offer the grip to hold everything perfectly in place as you stitch, ensuring your beginner-friendly quilting techniques are executed flawlessly.
- Attaching Binding: Whether it's a quilt binding, a garment edge, or a decorative trim, T-pins are excellent for holding bulky binding in place around curves and corners, giving you a smooth, even finish.
- Working with Lofty Batting: If your quilt has thick, fluffy batting, T-pins can plunge through it and the fabric layers, holding everything taut before basting or quilting.
- Pattern Adjustments & Draping: When pinning patterns to fabric, especially slippery or bulky ones, or draping fabric on a mannequin, the secure hold of T-pins keeps everything exactly as positioned.
- Appliqué: For holding appliqué pieces precisely onto a background fabric before stitching, T-pins provide a stable anchor without distorting the appliqué.
The key benefit here is reliability. You can trust a T-pin to maintain its position and shape, reducing frustration and improving the accuracy of your sewing and quilting projects.
Beyond the Textile Studio: Other Handy T-Pin Applications
While their primary calling is textile arts, T-pins are surprisingly versatile tools with many other practical uses. Their robust design and secure grip make them useful in areas you might not have considered.
- Wig Making & Styling: This is a major non-textile application. T-pins are universally used to secure wigs to wig heads (styrofoam or canvas block heads) during construction, styling, or drying. Their length allows for deep penetration into the wig head, keeping the wig firmly in place.
- Jewelry Display: For crafters who sell jewelry, T-pins can be used to neatly arrange necklaces, bracelets, or earrings on display boards, ensuring items stay put and look attractive.
- Craft Assembly: From holding pieces of foam core together for architectural models to securing elements in mixed-media art, T-pins offer a temporary yet strong hold that's easily reversible.
- Office & Home Organization: The Mr. Pen description even notes their utility for securing documents to bulletin boards or fabric cubicle walls. The T-bar head makes them easy to push into and pull out of porous surfaces.
- Taxidermy: In a more niche application, T-pins are used to position and secure animal skins during the drying and mounting process.
Their strength and easy-to-grip head lend themselves to any situation where you need a temporary but firm anchor that a regular straight pin just can't provide.
The Unseen Differences: Material and Quality Matters
Not all T-pins are created equal. Just as you wouldn't use dull scissors on fine fabric, investing in quality T-pins makes a noticeable difference in your crafting experience and the longevity of your tools.
What to Look For:
- Material:
- Nickel-Plated Steel: This is the most common material. It offers good strength and a smooth finish. However, nickel plating can wear off over time, especially with frequent use or exposure to moisture, potentially leading to rust.
- Stainless Steel: The gold standard, particularly for blocking. Stainless steel T-pins are rust-resistant, which is crucial when working with damp fabrics. They're typically slightly more expensive but worth the investment for peace of mind, especially when blocking light-colored yarns that could otherwise be stained by rust.
- Sharpness of Point: A truly sharp point will glide through fabric layers with minimal effort, reducing strain on your hands and preventing snags. Dull pins can push fibers apart or even damage them. Mr. Pen emphasizes their "sharp point makes it easy to push through."
- Smoothness of Finish: High-quality T-pins should be smooth from tip to T-bar. Any burrs or rough spots can snag delicate yarns or fabrics, causing frustration and potential damage.
- Strength & Durability: Good T-pins should resist bending, even when pushed through thick materials. Test a few if you can; they should feel sturdy, not flimsy.
Choosing T-pins made from stainless steel, especially for blocking projects that involve water, is highly recommended to prevent rust marks on your precious creations. For general sewing on dry fabrics, nickel-plated steel is usually sufficient. When looking for the best, remember that quality translates to ease of use and protection for your projects. You can delve into more general tools for your craft by exploring essential sewing tools every crafter needs.
Avoiding Pin Pricks: Common T-Pin Problems and Solutions
Even the best tools can present challenges if not used or cared for properly. T-pins are generally robust, but here are a few common pitfalls to watch out for:
- Rusting: This is the number one enemy, particularly for nickel-plated pins used in wet blocking.
- Solution: Invest in stainless steel T-pins for blocking. If you use nickel-plated, ensure they are thoroughly dried immediately after use. Store them in a dry environment. If a pin shows a speck of rust, discard it to prevent staining your fabric.
- Snagging Fabric: A bent or dull pin, or one with a rough finish, can catch on delicate fibers.
- Solution: Regularly inspect your T-pins. Discard any that are bent, dull, or feel rough. Use a pin that matches the fabric's weight (e.g., thinner pins for fine lace).
- Bending: While T-pins are stronger than straight pins, excessive force or pushing them into exceptionally hard surfaces can still cause them to bend.
- Solution: Choose the right length and gauge for your project. Don't force pins into surfaces that are too dense. If a pin bends, it's best to discard it, as a bent pin is more likely to snag or cause uneven tension.
- Leaving Holes: On some very fine or tightly woven fabrics, even a T-pin can leave a visible hole.
- Solution: Always test a pin on a scrap piece of your fabric first, especially if it's a delicate material. For these instances, consider using clips instead of pins, or only pin in the seam allowance where holes won't be visible.
- Lost Pins: T-pins, with their small size, are prone to getting lost in carpet or fabric.
- Solution: Always use a pincushion or a magnetic pin holder to keep them organized. The Mr. Pen assortment comes in a plastic box with partitions, which is excellent for keeping different sizes organized and preventing loss.
By being mindful of these issues and taking preventative steps, you'll ensure your T-pins remain a reliable asset in your creative toolkit.
Keeping Your T-Pins Sharp: Storage and Care
Proper care extends the life of your T-pins and ensures they perform optimally project after project.
- Dry Storage is Key: Always store your T-pins in a dry environment. Humidity is the fastest way to encourage rust, even on "rust-resistant" pins over time.
- Use a Dedicated Container: A magnetic pin dish, a fabric pincushion, or the plastic storage box (like the partitioned one from Mr. Pen) are ideal. This keeps them organized, prevents loss, and protects the points from becoming dull by rubbing against other metal objects.
- Clean After Use: If pins have been used in wet blocking or come into contact with sizing, dyes, or adhesives, wipe them clean with a dry cloth before storing. A quick wipe with an alcohol-soaked cloth can remove any sticky residue.
- Inspect Regularly: Before starting a new project, quickly check your pins. Discard any that are bent, rusted, or have rough spots. It's better to lose a single pin than to damage your entire project.
By following these simple care routines, your collection of T-pins will serve you faithfully for years, ready for every new creation.
Your T-Pin Toolkit: Equipping for Excellence
You now understand the profound impact T-pins can have on your textile projects. From ensuring perfectly blocked knitwear to securing the most challenging quilt layers, these pins offer precision and stability that few other tools can match.
When building or upgrading your T-pin collection, here’s what to look for:
- Variety is Your Friend: Start with an assorted pack containing various lengths (like the 1-inch to 2-inch range from Mr. Pen) to cover a wide array of tasks. You'll quickly discover which sizes become your favorites for specific projects.
- Prioritize Quality: Opt for stainless steel, especially if you plan on wet blocking, to avoid rust stains. A smooth finish and sharp points are non-negotiable for protecting your fabrics and hands.
- Consider Quantity: Textile artists often find themselves needing many T-pins for larger blocking projects. A pack of 100-200 pins is a good starting point, ensuring you won't run short mid-project.
- Smart Storage: Look for sets that come with a reusable, partitioned storage box, or invest in a magnetic pin holder. Organization prevents loss and keeps your pins in prime condition.
Don't underestimate the power of these unassuming tools. Equipping yourself with the right T-pins is a small investment that yields significant returns in the quality and enjoyment of your textile arts. Dive into the world of T-pins and discover how they simplify blocking, sewing, and quilting projects, letting your creative vision truly shine. To learn even more about these essential tools, explore Everything you need about t pins.