Crafting, sewing, and even small-scale model making rely on a surprising unsung hero: the humble T pin. These versatile tools are indispensable for holding fabrics, blocking delicate knits, or securing components, but their usefulness hinges entirely on their condition. Proper Storing & Maintaining T Pins isn't just about tidiness; it’s about preserving their sharpness, preventing rust, and ensuring they remain reliable project after project. Neglect them, and you risk snags, stains, and frustration. Treat them right, and they'll be a dependable ally in your creative endeavors for years to come.
At a Glance: Your T Pin Longevity Checklist
- Rust Prevention is Key: Keep pins dry and consider humidity control with silica gel.
- Choose the Right Storage: Magnetic containers, secure boxes, or emery pin cushions protect points and organize.
- Clean Regularly: Wipe away fabric fibers, glue residue, or oils to maintain sharpness.
- Sharpen When Possible: Emery pin cushions can refresh metal points; replace plastic pins when dull.
- Inspect and Discard: Heavily rusted or bent pins can damage materials and should be replaced.
- Handle with Care: Always pick up stray pins immediately to prevent accidents and loss.
Why Your T Pins Deserve TLC: More Than Just Storage
T pins, often known as drapery pins, are far more than simple fasteners. Their unique T-shaped head provides an easy grip, while their sharp, durable points can pierce multiple layers of fabric, foam, or even soft wood with precision. As essential tools in countless hobbies and professions, from securing quilting layers to shaping knitted garments during blocking, their performance directly impacts the quality of your work.
Think about it: a dull T pin struggles to pierce fabric cleanly, potentially snagging delicate threads. A rusted T pin can leave unsightly marks that ruin an entire project. And a bent pin? That's not just useless; it’s a hazard. The stakes are higher than you might think when it comes to the condition of these seemingly small items. Investing a little time in their storage and maintenance pays dividends in professional results, extended tool life, and a safer workspace. To understand more about these indispensable tools and their many applications, you can Learn more about T pins.
The Silent Saboteurs: What Happens Without Proper Care?
Ignoring your T pins is an open invitation for several frustrating and costly problems. Understanding these common pitfalls is the first step toward effective prevention.
Rust: The Arch-Nemesis of Metal Pins
Rust is arguably the biggest threat to your T pins. Metal pins, especially those made from common steel, are highly susceptible to oxidation when exposed to moisture and air. A rusty pin isn't just unsightly; it's detrimental:
- Fabric Stains: Rust easily transfers to fabrics, leaving orange or brown marks that are incredibly difficult, if not impossible, to remove. This can ruin hours of work on a project.
- Dullness and Damage: Rust pits the metal surface, making the pin rough and dull. This increases friction, making pins harder to insert and more likely to snag or damage delicate materials.
- Weakened Structure: Over time, rust can compromise the structural integrity of the pin, making it brittle and prone to breaking.
Dullness and Bending: Impact on Precision
Even without rust, T pins can lose their effectiveness. Constant use, especially on thick or dense materials, will naturally dull their points. Storing them improperly, such as in a loose pile where they bang against each other, can accelerate this.
- Difficulty Piercing: Dull pins require more force to insert, which can lead to finger strain or cause you to inadvertently push fabric out of alignment.
- Material Damage: Instead of cleanly separating fibers, a dull pin can tear or fray them, leaving visible damage on your project.
- Bending: When a dull pin encounters resistance, you might apply more pressure, leading to the pin bending. A bent pin is no longer precise and often becomes unusable.
Loss and Disorganization: The Time-Waster
How many times have you set down a handful of pins, only to discover them scattered or missing when you need them next? T pins are small, and without a dedicated storage system, they become masters of disappearance.
- Wasted Time: Searching for lost pins interrupts your creative flow and wastes precious minutes (or more) that could be spent on your project.
- Project Delays: If you can't find enough pins, your project might grind to a halt until you replenish your supply.
- Frustration: The cumulative effect of constantly misplacing tools can make any enjoyable hobby feel like a chore.
Safety Hazards: Pricks and Punctures
Lost or improperly stored pins pose a genuine safety risk, not just to you but to anyone else in your workspace or home.
- Accidental Punctures: Stepping on a T pin, or reaching into a drawer and encountering a loose one, is a painful experience.
- Pet and Child Safety: Loose pins are particularly dangerous around curious pets or small children, who might ingest them or suffer serious injury.
- Damage to Equipment: Pins left on floors can get swept into vacuum cleaner motors, causing damage, or lodge in furniture.
Mastering T Pin Storage: Your First Line of Defense
Effective storage is the cornerstone of T pin maintenance. It protects them from environmental damage, keeps them organized, and ensures they're always ready for action.
The Right Container for the Job
Choosing the right storage solution depends on your work style, the number of pins you have, and your environment.
- Magnetic Pin Bowls and Pads: These are incredibly popular for a reason. A strong magnet keeps pins securely upright and easily accessible.
- Pros: Prevents scattering, quick retrieval, often comes with lids for travel.
- Cons: Pins can still be exposed to humidity if lid isn't airtight.
- Best For: Everyday use, keeping pins handy during a project.
- Secure Lidded Boxes: Whether plastic or metal, a box with a tight-fitting lid is excellent for bulk storage or protecting pins from dust and moisture.
- Pros: Great for long-term storage, keeps pins completely contained, can be stacked.
- Cons: Pins might jostle and dull against each other if not separated.
- Best For: Storing large quantities, travel, or protecting pins from a humid environment (especially if you add a desiccant).
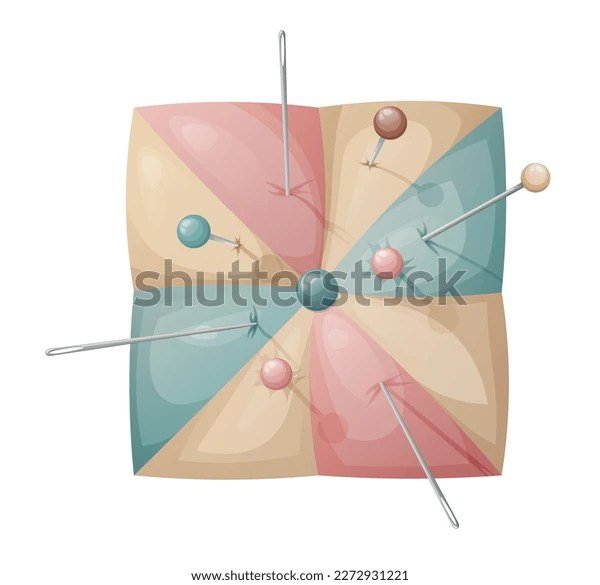
- Pin Cushions (Especially Emery): While traditional pin cushions hold pins, an emery pin cushion serves a dual purpose. Filled with abrasive emery sand, it not only stores pins but also cleans and sharpens them each time they are inserted and removed.
- Pros: Actively maintains sharpness and cleanliness, provides a soft landing for points.
- Cons: Not ideal for very long T pins that might protrude too far; pins are exposed to air.
- Best For: Active workstations where pins are frequently used and need regular sharpening/cleaning.
- Drawer Organizers and Dividers: For larger craft tables or dedicated sewing rooms, compartmentalized drawer inserts can keep different sizes or types of T pins separated and orderly.
- Pros: Keeps pins out of sight but easily organized within a drawer system.
- Cons: Still requires individual containers or magnetic strips within compartments to keep pins from tangling.
- Best For: Comprehensive organization of a large collection of sewing and crafting notions.
Environmental Control: Keeping Rust at Bay
Where you store your T pins is almost as important as how. Humidity is the primary culprit behind rust.
- Humidity's Role: Water vapor in the air condenses on cool metal surfaces, leading to oxidation. Basements, garages, and even bathrooms are often high-humidity zones.
- Silica Gel Packs: These small desiccant packets are a game-changer. Place one or two inside any airtight container where you store metal T pins. They absorb ambient moisture, significantly reducing the risk of rust. You can often reuse them by drying them in a low oven.
- Avoid Basements/Garages: If possible, store your craft supplies, including T pins, in a climate-controlled area of your home, like a dedicated craft room or office. If you must use a less-than-ideal space, double down on airtight containers and silica gel.
- Airtight Containers are Crucial: Even in a low-humidity room, an open container allows pins to collect dust and some moisture. A good seal is your friend.
Organization Hacks for Sanity
Beyond just storing them, smart organization makes your crafting life easier.
- Group by Size/Type: If you use various lengths or thicknesses of T pins, keep them separated. Use smaller divided containers or label your main storage boxes.
- Label Everything: A simple label on the outside of your container ("T Pins - 1.5 inch") saves you from opening multiple boxes to find what you need.
- Clear Containers: Whenever possible, opt for clear storage boxes so you can visually confirm the contents without opening them.
Beyond Storage: Active Maintenance for Lasting Sharpness
While good storage protects your T pins, active maintenance ensures they perform at their peak. Think of it as giving your pins a little spa treatment.
The Cleaning Ritual: Wiping Away Residue
T pins accumulate grime surprisingly fast. Fabric fibers, dust, a tiny bit of adhesive, or even skin oils can build up on the pin's shaft and point.
- Why Clean? Residue makes pins sticky, harder to insert, and can transfer onto your projects.
- Gentle Cleaning Methods:
- Rubbing Alcohol: A quick wipe with a cotton pad or cloth dampened with rubbing alcohol can dissolve oils and many glues.
- Mild Soap and Water: For stubborn grime, a very mild soap solution (like dish soap) and water can work. Ensure you thoroughly dry the pins immediately afterward to prevent rust.
- Emery Pin Cushion: As mentioned, a quick jab into an emery pin cushion helps to clean and polish the pin's surface.
Sharpening (When Possible & Practical)
Not all T pins are created equal when it comes to sharpening, but many can benefit.
- Emery Pin Cushions: This is the easiest and most common way to maintain the sharpness of metal pins. Each time you insert and withdraw a pin, the abrasive emery material gently grinds away microscopic dullness and polishes the surface.
- Fine-Grit Sandpaper or Sharpening Stone: For very dull or slightly rough metal T pins, a piece of fine-grit sandpaper (400-600 grit) or a small sharpening stone can be used. Gently draw the tip of the pin across the abrasive surface at a slight angle, rotating the pin to create a symmetrical point. Use extreme caution to avoid injury.
- When to Replace Rather Than Sharpen:
- Plastic T Pins: These cannot be effectively sharpened once dull or bent. Their material simply doesn't hold an edge. Replace them.
- Severely Bent or Pitted Metal Pins: If a metal pin is significantly bent or deeply pitted by rust, sharpening is often futile. The structural damage means it won't hold a point well or might snap.
Rust Prevention: Proactive Measures
Beyond storage, a few extra steps can provide an additional layer of protection against rust.
- Oiling (A Light Coat): For pins you store for extended periods, or if you live in a very humid environment, a very light application of acid-free machine oil or mineral oil can create a protective barrier. Wipe off any excess thoroughly to avoid transferring oil to fabric.
- Vapor Corrosion Inhibitors (VCIs): VCI papers or chips release a protective vapor that forms a thin, invisible layer on metal surfaces, preventing rust. You can place small pieces inside your airtight pin containers. These are commonly used for protecting tools.
- Handling with Dry Hands: The natural oils and moisture on your hands can contribute to rust over time. While not always practical, try to handle your T pins with clean, dry hands, especially before putting them away for storage.
Common T Pin Dilemmas & Solutions
Let's tackle some frequently asked questions and common problems you might encounter with your T pins.
"My T pins keep rusting, even in a closed box!"
Solution: This almost always points to high humidity within the box itself or in the storage environment. Ensure your box is truly airtight. Add a few fresh silica gel packets to absorb moisture. If your craft room is generally humid, consider a small dehumidifier for the space.
"Can I sharpen plastic T pins?"
Solution: No, generally not. Plastic T pins are designed for affordability and specific uses where a super-sharp metal point isn't critical (e.g., blocking delicate knits without risk of snagging). Once they become dull or the tip breaks, they should be replaced. Trying to sharpen them will likely just create a rougher, less effective point.
"What if I step on a T pin?"
Solution: The best solution is prevention through meticulous storage and cleanup. Always keep a magnetic pin bowl or pin cushion at arm's reach when working, and make it a habit to immediately return pins after use. If you do drop pins, a magnetic wand or a strong magnet on a stick is invaluable for quickly sweeping them up from the floor.
"How often should I clean my T pins?"
Solution: A good rule of thumb is after each major project or whenever you notice them becoming sticky, dull, or accumulating visible residue. If you use an emery pin cushion, it provides continuous light cleaning and sharpening, so a deeper clean might only be needed occasionally.
"My pins bend easily. Are they low quality, or am I doing something wrong?"
Solution: It could be a bit of both. Thinner gauge T pins are more prone to bending, especially when used on very dense materials. Higher quality pins are often made from tempered steel and will resist bending better. However, even the best pins will bend if forced through material that's too thick or if they're already dull and require excessive pressure. Ensure your pins are sharp, use the appropriate gauge for your material, and consider an awl to pre-pierce very tough layers before inserting pins.
When It's Time to Say Goodbye: Knowing When to Replace
No matter how well you care for them, T pins aren't immortal. Knowing when to retire them is crucial for maintaining the quality of your work and your safety.
- Severely Rusted Pins: If a pin is heavily rusted or deeply pitted, discard it immediately. The risk of rust transferring to your fabric is too high, and the structural integrity is compromised.
- Bent or Dull Beyond Repair: If a metal pin is bent to the point where it can't be straightened without risk of breaking, or if its point is so dull or damaged that sharpening is ineffective, it's time for a new one.
- Plastic Pins with Broken Tips: Once the tip of a plastic T pin breaks or becomes significantly blunt, it loses its purpose. Dispose of it responsibly.
It's tempting to hold onto every last pin, but a small investment in a fresh batch of T pins can save you immense frustration and potential damage to your valuable projects.
Your T Pin Toolkit: Essential Accessories for Longevity
To truly master T pin care, consider these small but mighty additions to your crafting toolkit:
- Magnetic Sweeper/Wand: Indispensable for quick cleanups of dropped pins.
- Small Airtight Containers: Perfect for storing pins with silica gel, especially for travel or long-term storage.
- Silica Gel Packs: Your best friend for humidity control in pin containers.
- Emery Pin Cushion: A must-have for continuous cleaning and sharpening of metal pins during use.
- Microfiber Cloth or Cotton Pads: For quick wipes with rubbing alcohol to remove residue.
The Payoff: Why This Matters for Your Projects
Taking the time for proper storing and maintaining T pins isn't just about prolonging the life of a tool; it's about elevating your entire crafting experience.
- Improved Project Quality: Sharp, clean, rust-free pins mean precise placement, no snags, and no unsightly stains. Your finished pieces will look more professional.
- Cost Savings: Well-maintained pins last longer, reducing the frequency with which you need to buy replacements.
- Enhanced Safety: Organized, properly stored pins significantly reduce the risk of accidental punctures for you, your family, and your pets.
- Reduced Frustration, Increased Enjoyment: Imagine never having to hunt for a pin, or discovering a rusty one just when you need it most. A well-cared-for toolkit allows you to focus purely on the joy of creation.
Make the commitment to care for these small but mighty tools, and you'll find your projects flow smoother, your workspace stays tidier, and your crafting becomes an even more rewarding experience.